The Daring Cooks’ March Challenge: Let’s Get Cheesy
One of the things Mini-M and I can't eat because it's pretty much pure unadulterated dairy.
Many dairy ingredients can be successfully substituted without ever noticing much difference, but cheese isn't one of them. Most of the 'dairy free' or vegan cheese substitutes I've tried over the past few years have been vile to put it mildly. And that is coming from someone who never had a sophisticated cheese palate - I wasn't ever a fan of complex flavoured blue cheeses, rinded soft cheeses or even strong hard cheeses. I was more of a medium cheddar / feta / edam / mozzarella sort of person.
So I have to admit my heart sank a little bit when the March Daring Cooks' challenge was announced, and we were tasked with making our own cheese.
I have to confess I have watched the forum posts with more than a little envy as folk have produced some fantastic looking homemade halloumi, labneh, ricotta, farmer cheese, and more.
BUT not one to be deterred, I also thought I'd try my own hand at making some dairy free cheese, and whilst I may be slightly biased, I do think this is better than any of the commercially produced cheese substitutes I've tried.
I found a recipe for coconut "cheddar" at Sweet Roots which I changed a bit, due to not having quite the right ingredients (as usual). I'd probably recommend just following the recipe over there, but will share mine anyway, just in case you find yourself in a similar not-quite-having-the-right-things predicament!
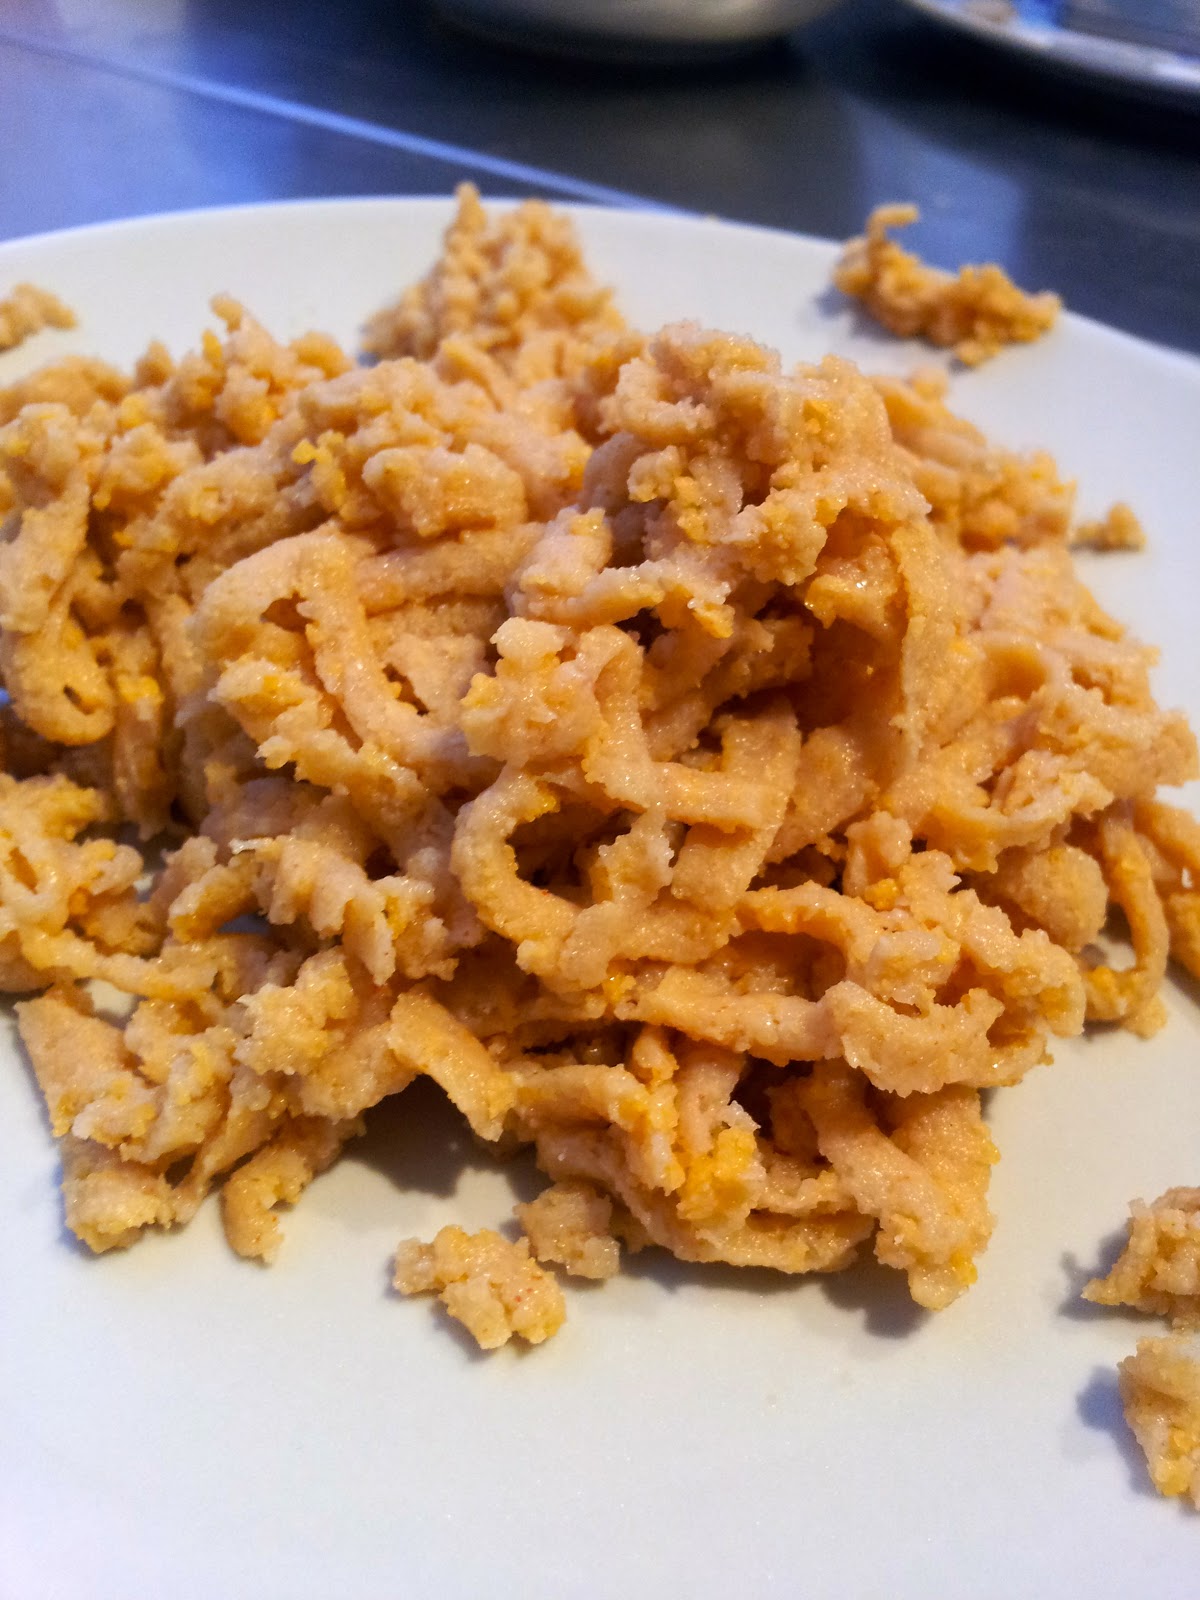
 |
| So it's not exactly the prettiest "cheese" in the world... |
- 1 400g Tin Coconut Milk
- 1.5 tbsp Agar Flakes
- 1 tbsp Balsamic Vinegar
- 2 tbsp Potato Starch
- 1/2 tsp Smoked Paprika
- 1 tsp Sea Salt
- 1.5 tbsp Nutritional Yeast Flakes
Tip the coconut milk into a saucepan and heat gently until the solids and liquids have melted back together again. If your can of milk is fairly warm it won't have separated too much. I had to cut mine out of the tin with a knife!
Whisk in the vinegar, agar flakes and salt then bring to the boil and boil gently for 15 minutes.
Next whist in the potato starch, nutritional yeast flakes and paprika and simmer for another 10 minutes or so during which time it will start to thicken.
Lightly grease a shallow dish or small loaf tin, then sieve the mixture through a fine sieve into the tin.
Allow to cool for an hour, then pop into the fridge for another couple to firm up.
Eaten as is, it does taste cheesy, and has the slightly rubbery texture of cheese, albeit a little softer and wetter. It grates too :o)
 |
| Grated "cheese" - still not pretty! |
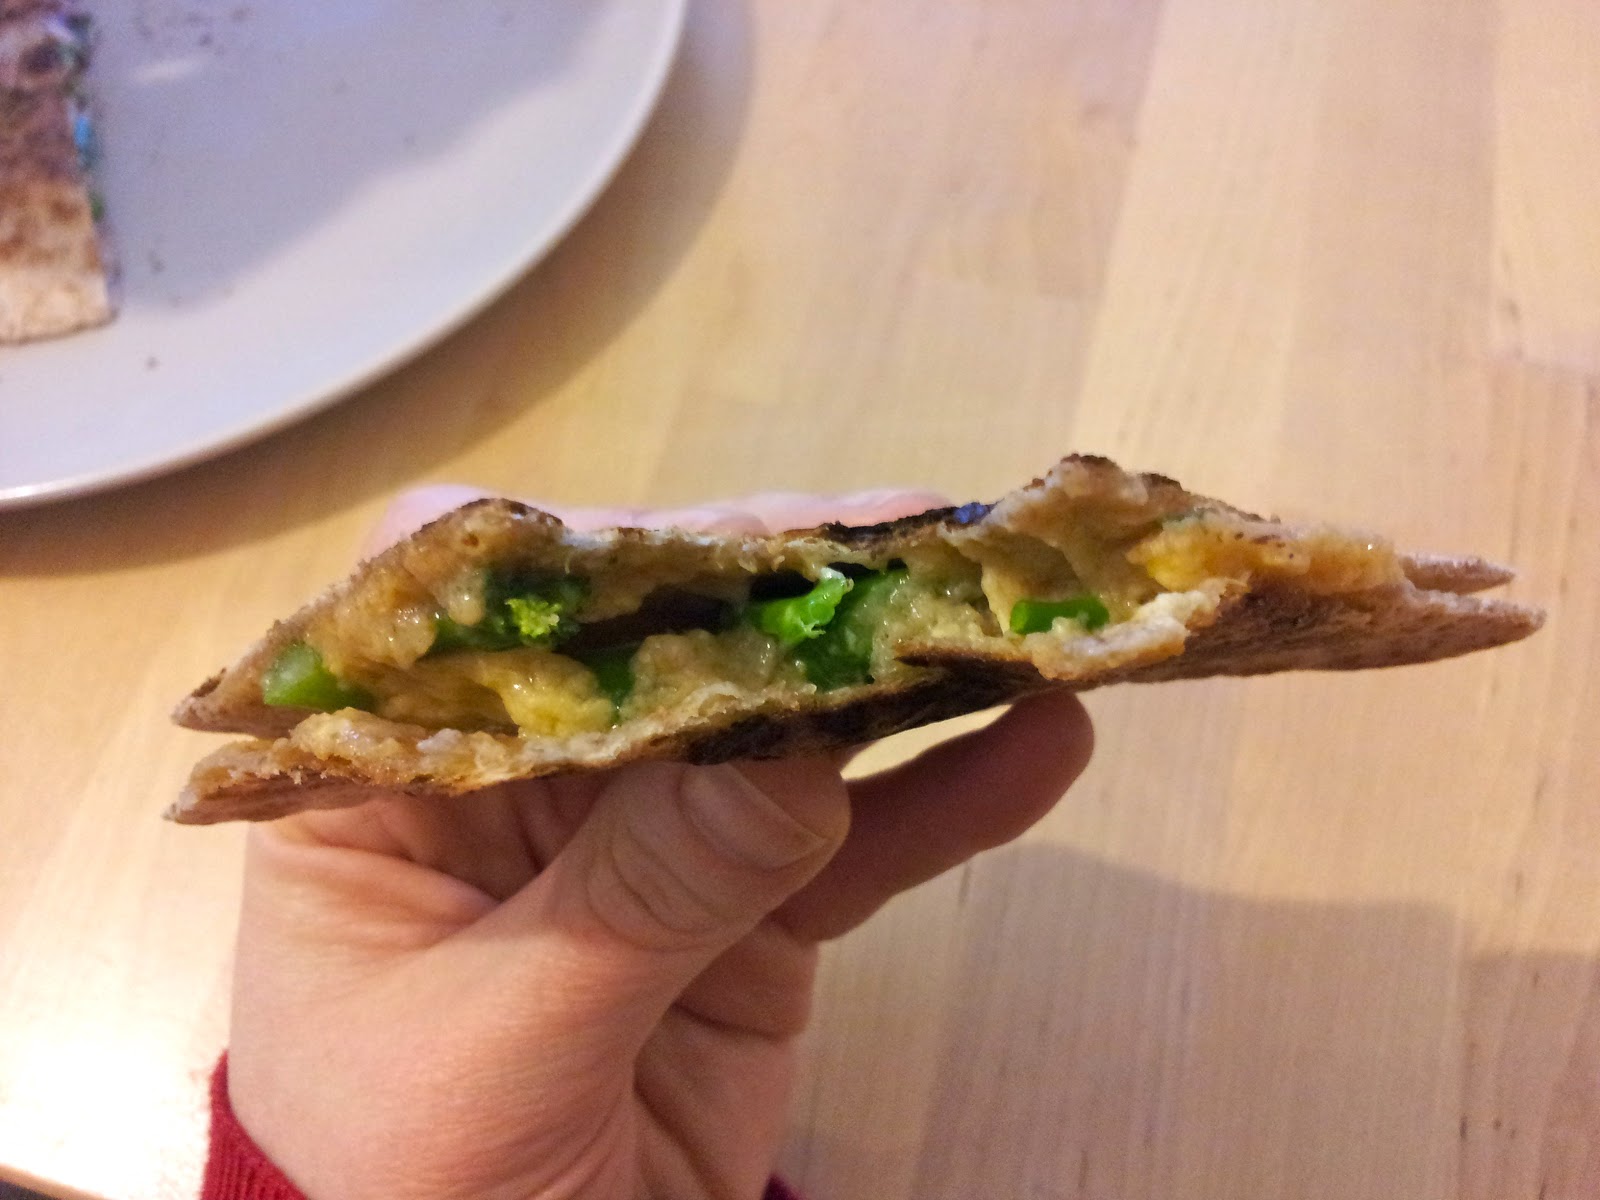 |
| Melty "cheese" and broccoli is slightly more photogenic! |
 |
| The non-"cheesy" ingredients |
 |
| Then... |
 |
| Now... |
Blog checking lines: Sawsan fom Chef in Disguise was our March 2013 Daring Cooks hostess! Sawsan challenges us to make our homemade cheeses! She gave us a variety of choices to make, all of them easily accomplished and delicious!
